Showing posts with label Building. Show all posts

Thursday, 24 July 2014

Bathrooms are in!

The same time the kitchen went in, the cabinetry for the bathrooms also went in, and then it wasn't long and I had a tiler on-site. The wall tiles went up first and then the floor tiles.
 
I don't have any great photos of the bathrooms yet. So once again you may need a little imagination.
 
With the main bathroom in 'selections' I took the risk and decided to put the same tile on both the floor and the wall, a grey tile. I've been very anxious to see how this would turn out but I must say I am very happy. I love the seamless look, although some might say the dark tiles make the space smaller, I tend to disagree, it think it gives the space a moody, intriguing feel.
I paired this with my dark vanity cupboard, with a white bench top. Overall I love it.


The only thing which I would possibly change, which was sort of an over sight on my behalf is the tile on top of the bench. I probably should have gone for something different here. but honestly I remember being in my selections appointment with a million and one things to decide on, my brain kinda shut down and I said to just go with the same tile. I'm still very happy with it, but I guess I may change that down the road. I do have some ideas, but that would be way, way down the track.
 
You may (or may not) recall me talking a while back about my white ensuite bathroom plans here. Well its been great to see that come to fruition. Basically, just like my kitchen, I wanted it all white. The floor tiles, wall tiles and grout. Yes white grout. Call me crazy. I know its going to be a nightmare to keep clean but sometimes you just gotta do what you gotta do. I have sourced a grout sealer which I plan on using to help, I'll talk about it further another time.


So once again I have white cabinetry, this is the exact same doors as my kitchen, and exact same benchtop colour except its not gloss, just a matt finish.
 
I'll also be adding my Ikea mirror cabinet in the ensuite, which I blogged about here.

Wednesday, 23 July 2014

My ALL-White Kitchen....progress

I while back I wrote about my love of ALL-white kitchens, well its now a reality.

The day my kitchen was installed was a pretty exciting one. It made the house look a lot more like a home. Its all white, sleek and exactly what I wanted.


This picture was taken on my phone through my very dirty glass doors as I hadn't been able to get into the house at this point. It does the kitchen no justice at all, but in real life it looks lovely.

You just need to squint and imagine a splashback, pendent lights, down lights, appliances, wood floors and kitchen accessories. Its going to look amazing, I promise.

This is just a regular ol' laminate kitchen, no fancy stone benchtops or solid wood cupboards, but I'm out to prove that builders basic can look amazing. So watch this space...

Tuesday, 22 July 2014

Lock up = Doors, skirting, architraves

Lock up... I could no longer walk through the house unless I managed to get there when tradies were there working. Which was rare as I was at work most of the time.
 
Internal doors, skirting timbers, architraves and cornice all went up next. I decided to ask my site supervisor to leave the skirting timbers off in the main living areas and hallway as I am installing the flooring myself after handover and prefer a seamless look.

Generally these are installed (nailed and glued on, so quite a challenge to remove) and then people install their flooring and then have a strip of 'beading' added. although its not a bit deal and most people wouldn't notice, its one of those things that would just irk me. Its just a personal preference.


So basically what that all means is there are strips of uncut skirting timber left behind and once I install my flooring I will also cut and install the skirting boards myself. Bit of extra work, but I believe worth it.

Hoepfully I don't regret it later haha.


Monday, 21 July 2014

Insulation and Internal walls

Following on from my previous update post...

The electrical wiring went in next, followed by the insulation. For those who like the technical details I have R4 in the roof, R2.5 in the external walls.
 
I also choose to add internal wall insulation. This all helped my house pass the 6 star energy rating which is required when building a new home.


Only a few days passed and all my internal walls and ceiling were up. This was a bit of a wow moment as it finally started looking like a home. I could walk in all my rooms and image the furniture placement. It was also great to be able to see how the light flowed in through the different windows, depending on which direction they face.


This was kind of a sad moment too as I knew it wouldn't be long before all the doors went on, which means the house is at 'lock up' and I can no longer walk through unless there is tradies working there, as I don't have a key, but this also means one step closer to completion.


Thursday, 17 July 2014

Lots and lots of updates

So it appears I up and vanished for a couple of months. woops. The house is almost at completion so I better catch up on updates and all the juicy details. First up the exterior, bricks and roof.


Loving my brick choice, its PGH Oyster with a light (almost white) mortar. I was a bit concerned when my 'brickie' sand was delivered as I thought it would look white, but it looked way too dark, however once it was up I could see that they had it right. The white sand, which was combined with 'brighton lite' mortar, ended up being quite a costly upgrade, however I am so happy that I did it. The standard for my builder is a 'grey' mortar, but honestly when they mix it with the regular orange brickies sand, it comes out an organgie brown colour. Which with my grey bricks, just would have looked terrible.


Its funny because in my area there were no houses with grey bricks and now they seem to be popping up everywhere in the last couple of months. When I was trying to decide which bricks to go with I had to drive over an hour away just to find a few houses with a grey brick.


Then the gutters, facia and roof went up. Only took them 1 day to put all that roof sheeting on, crazy. The colour is Colorbond Surfmist, its almost white. I love love love it! Most houses in my area have dark roofs, usually colorbond woodland grey or similar, so I like that I went with something a bit different. I will also be having a surfmist garage door, but that wont go on until the house is almost complete.


I was a little worried about my gutter-facia colour combo. I went with woodland grey for both. Little bit different as most people recommend that your gutters match your roof colour but I felt it needed some contrast and I'm really happy with how it turned out. pheww.

Photos do it absolutely no justice, Ill defiantly be uploading better ones in future.
 

Wednesday, 12 March 2014

Progress...

Thought I'd better put a quick little update on here. Progress with the house is feeling painfully slow, probably doesnt help that I drive past multipul times a day. Its like watching paint dry haha.

But I know all good things take time and I must be patient. Probably not one of my strongest qualities.

In the past few weeks the windows and sliding doors were installed which was exciting, they have loooovely white frames. I've also had gutters and brickie sand delivered, so surely there will be some more action soon.

Here's an early morning pic, with the sun shining in my living room :)


Friday, 14 February 2014

Up..UP..UPPP she goes


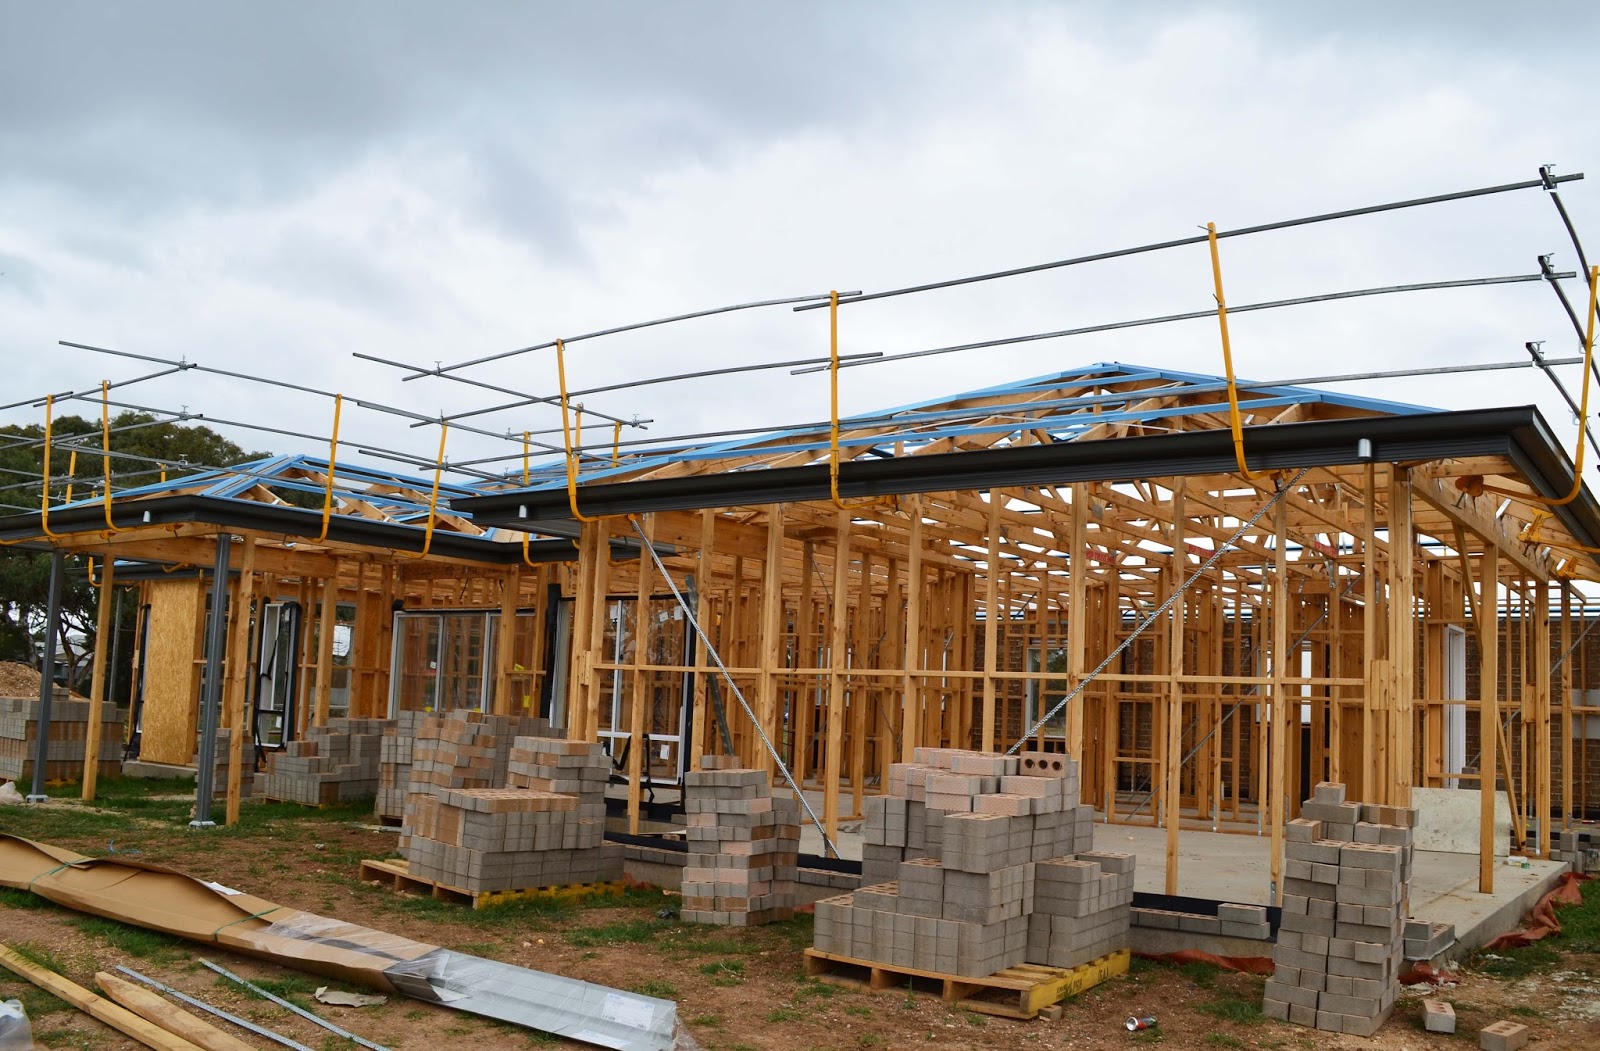
My house has finally turned 3D.... Framework is done.

It took 4 tradies only 3 days to put it all together. It looks mighty fine if you ask me.

.............................................................................................................................................................


 This is looking into the 2 car Garage. The second pallet of bricks towards the back of the photograph (on the left) is where the outdoor alfresco is.


This is looking down my long hallway in the centre of the house. To the right is a bathroom and the laundry. At the very back is a bedroom. 


This is standing in the dining room looking down through the kitchen and into the living room. That big pile of dirt out there will be my backyard. To the left of the photograph (where the bricks are sitting) will be a glass sliding door with access to the outdoor alfresco area.


Just a photo of the roof framework


This is looking back at the rear of the house, on the left is a bedroom and on the right is the living room.


..and a photo of me standing at my kitchen sink haha. Please excuse the daggy after work attire.


Cant wait to see my roof go on next and then see some brickwork start!

Monday, 10 February 2014

Flooring....check!!


My flooring has been selected and deposit paid. Although I still have a couple of months before I need my flooring, its one of those things I just wanted to get out of the way so I can move onto other decisions. So many decision lol. My local carpet store had a great sale on so I decided to take advantage of what they had on offer.

The flooring budget was tight, as with everything. Although I'd love to have fancy hardwoods throughout, my budget just doesn’t allow for that and therefore I decided on laminate wood-look planks. A lot of my family have it in their homes and have nothing but praise for it. Its hard wearing and no maintenance required.

I wasn’t 100% sure what type of laminate I would go for as there are hundreds of options, long boards, short boards, wide boards, beveled edges, flush edges, gloss, matt etc. I guess I was just looking for something that looked like real timber floors to me, and hoping to find something that would draw me in and I would just 'know'. I liked the idea of the longer boards, but really had no idea of colours as I like both light and dark timbers.

My local store had a great longboard product which was on sale called 'Titan Longboards', it has a gloss finish, but not high gloss and a small beveled edge. There were a bunch of colours but I was straight away drawn to ‘spotted gum’. They laid it out on the floor on top of the real ‘spotted gum’ timber and you could not tell the difference. It looked just like the real thing, I'm not making this up.


Then we wondered over to the carpet section. I was planning for the master bedroom and one of the minor bedrooms to have carpet. The third bedroom would have the laminate. I didn’t realise there were so many different types of carpet, different styles, materials, finishes. I wanted a dark charcoal grey, and they had just the thing on sale for a great price. It’s not super plush but I was advised not to go that route and plush carpets wear a lot faster than the harder carpets. The dark colour is probably a bold choice, a lot of people advised me against it but I had to choose what I loved, otherwise I knew I'd regret it if I played the safe option. 


I've decided to install the laminate flooring myself (with some family help of course) this saved me a lot of money. It'll be a time consuming task, but I'm in no hurry so it doesn’t really matter how long it takes. 


Hopefully it will all look great once laid. 


Thursday, 30 January 2014

Selections Overlode

I did my internal selections for my house back in November 2013, which already seems like a lifetime ago... anyway thought I'd better put an update on here of everything I picked.

So to explain to those who haven't built a house before, everything gets picked at your 'selections appointment', this appointment only goes for a couple of hours,  and you need to decide on everything - tiles, grout, cupboards, benchtops, handles, tapwear, doors, appliances, sinks, basins, the list goes on and on. If you want to make changes later, it can be a big hassle and usually will cost you. Doesn't sound too hard right? haha well maybe for some, but for me, someone who dreams of interiors all day, every day, its a big deal! I had to get it right.

I did do the smart thing and visit the display rooms numerous times prior to my appointment to get a good idea of what I wanted to go with. I pretty much had everything picked before I even went into my selection appointments which I definitely recommend. I've heard a lot of stories of people who wait until their final selection appointment, then basically go in blind and attempt to pick everything at once. Crazy people! ... I wouldn't want to be in their shoes.

I couldn't just pick anything in the selection center however, as there was a standard range that my builder uses and anything out of this is an extra cost. I managed to find most items in the standard range that I was pretty happy with, with only a few things which I paid extra for. In some ways it makes the process a lot easier as choosing from a smaller selection makes it a little less overwhelming.

The official names for everything I picked is listed below for those out there who are interested. Otherwise just enjoy my not-so-good iPhone photos :/


Kitchen
Cupboards – Silk LX White
Bench top – White Valencia (Diamond Gloss finish)
All door handles will be installed Horizontal
Splashback to be done post handover


                    Zoom in (real dimensions: 914 x 1024)Image


Main bathroom
Floor and wall Tiles – Santorini argento natural with Magellan grey grout
(went for a bit of a risk here choosing the same tile for both the floor and walls, hoping it'll turn out ok)
Vanity Cupboard - Asphalt
Vanity bench top – White Valencia (matt finish)
Linen cupboard – LX white


Zoom in (real dimensions: 581 x 1024)Image

Ensuite Bathroom
Wall Tiles – Concept Ice
Floor Tiles – Concept Ice plain matt
Vanity cupboard – Silk LX white
Vanity Benchtop – white Valencia (matt finish)


Internal wall colour – Winter Sky
Doors/Skirts/Aves – Winter Sky
Ceiling – White

(sorry no pics)


So what do you think? all very safe, neutral colours but I think it'll look great!  Fingers crossed.


Tuesday, 28 January 2014

Slabtastic!

So I'm way behind on updates, I know, I know, bad blogger. Not a lot has been happening on the house front except...... I have a SLAB!!!!


It all happened quite unexpectedly, back early December 2013 I had contacted my builder and been advised that site works for my foundations (slab) would only start towards the end of January as they were about to shut down for a few weeks over the Christmas/ New year period. Anyway... it was quite a surprise as I was driving by my land only 3 days later to see workmen and large machinery leveling my site and digging trenches. I think I screamed with excitement.

The guys worked flat out for 3 days prepping the site, installing the plumbing, putting in the reinforcing mesh and fancy orange plastic.


Then the slab concrete was poured the following Monday. I walked on it that night, it was pretty exciting!


At the time it was all very overwhelming as like I said, I wasnt expecting anything for at least another month, I was all mentally prepared for the new year. The moment I seen the workmen on my site it all sunk in that this is really happening, my house will not be far away. Although I am sooooo excited about it all, I also have a lot of nerves as this will bring a lot of change in my life, but change is good as they say. 

Tuesday, 8 October 2013

Labor Day Weekend

Hope everyone had a lovely weekend. We just had our 3 day Labour day weekend, which was awesome. Also day light savings just started here in South Aus, which is so nice to have a few extra hours of day light in the evenings. I’m getting pretty excited as this all means summer is on it's way, my favorite time of year!
I went back to the house selection centre on Saturday to refresh my memory on a few things. I took mum with me, sometimes it’s nice to have a second opinion. We went over everything, I didn't lock as much in as I had hoped but it still helped to have another look. 

One decision I did make is to pay the upgrade cost for different brick mortar. I want white mortar using white sand. The standard browny-grey mortar just doesn't work with the Oyster bricks for the look I'm going for. The bricks end up looking dirty brown instead of a true grey. I think its defiantly worth the extra $$.
 Oyster bricks with white mortar

I'm still undecided on bathroom tiles. Iv narrowed it down to a few choices, but still unsure.
Also found a different kitchen sink with no drainers, which I love. Not sure if they will let me have it without it costing me a fortune, so waiting to hear back on that one.
Its pretty overwhelming trying to pick everything for a house all at once, but ill get there. Its slowly coming together.


Thursday, 3 October 2013

Where its at..house progress update

A little house status update of where things are at:
  • Plans are currently in Council for full development approval. Expecting this to be complete possibly early November but I'm not really sure. Fingers crossed that it goes through smoothly and they don't have any issues with my plan and the position it sits on my land.
  • Currently trying to finalise my electrical layout. This is hard. Hows a girl to know where to put every single power point, light and switch for a house thats not even built. I'm just trying to figure out where everything will go so I can make sure they are all in the right spots and I have enough for all appliances that require electricity. Cant go too crazy as the $$$ soon adds up with extra power points and lights.
  • Booked my final selections appointments for early November. That's where I'll lock in all my bathroom tiles, kitchen colours, wardrobes, wall colour and a tonne of other stuff. Thinking of heading down to the showrooms again this weekend to have a look at everything and try and lock a few things in. 
Also thought I'd add a pic of my front elevation/facade. It gives you a rough idea of what the front of the house will look like.
The house is only 11.5metres wide at the front, so all you see is the garage roller door, front door and bedroom window. I'm not having any render so the whole front will just be my lovely Oyster grey brick.


Wednesday, 2 October 2013

Bricks, bricks, bricks

Choosing the brick colour for my house was probably the hardest decision of the whole build. Why? Well with every other little detail I know what I want, or I at least have ideas floating around in my head. With the bricks however, I had no idea, no clue at all.

Now the bricks is a pretty big decision, it’s the whole look of your house. Maybe that’s why I was so indecisive, because I knew it was kind of a big deal if I got it wrong. I would have to live with this choice everyday, its not one that could be changed later unless you did something drastic. There was also the cost to consider. I was not real keen on spending more money to upgrade bricks, so I was eager to select something from my builders standard range.
I looked over the brochures I had been given, trying to pick a few out that I liked. But it was pretty hopeless as I knew they would look drastically different in real life.
So a few weeks back I went down to the local PGH brick display center for the first time. It was really fantastic with all the different brick colours and styles on display walls. It was interesting how the colours also looked different depending on the light or shade or direction they were facing. Also the colour of the grout seemed to have a big effect. I narrowed my selection down to 5 colours, and they let me take some samples home, woohoo!

My top 5 = Caffe Latte, Plateau, Canyon, Vanilla Ice and Oyster. 
Quite a variety really. A few mid browns, a dark brown, a grey and a white.

Another week or so past, and I eventually whittled it down to my two favorites, Plateau -the dark red-ish brown and Oyster the grey brick.

I kept leaning towards Plateau as I had seen quite a few dark brown houses around and knew I like it, but I was a bit worried that plateau would come out a bit too red.
Oyster was hard as I couldn't find any houses in my local area with anything that resembled a grey brick so had to go for a long drive and eventually found a few.
Oyster felt more risky than Plateau, but also would suit my whole love of grey thing I have going on, and it would compliment my interior plans really well.

Eventually I had thought about it so much, going back and forth between the two colours, it was doing my head in. You know sometimes when you think sooo much that you start to not even care. Well that was me. I needed to make a decision and just go with it. I knew either colour would look great anyway.

So.......I went with the grey, Oyster it is!!  Lets hope it turns out ok.


Thursday, 19 September 2013

House Floor Plan

I've always loved looking at house plans. Imagining what each room would be like, how it would flow, seeing how the space had been utilised to its maximum potential, positioning of windows, doors etc. I remember way back when I was probably 14, maybe even younger, excitedly waiting for the Sunday paper just so I could look through the 'Home' liftout. I would analyse each floor plan and pick out what I liked and didn't like. Of course back then I was drawn to the big fancy ones with 5 plus bedrooms, buttlers pantries, walk in robes the size of my bedroom. but who doesn't fantasise about that! Maybe I'll have a McMansion one day.

Anyway fast forward to 2012 when I decided to have a poke around some display homes with Mum and Dad in tow. With my budget, a small 3 bedroom would be all I could afford, but in reality its all I need. Plus I knew that no matter what house, what size, I would love it because it was mine. I was just ecstatic that this was really happening, I was actually looking at houses for real! So we ended up looking through 3 display homes that I had picked out of the catalogue which fitted my criteria.

I knew the moment I walked into the display home that I am now building, it was the one for me. It just felt right... you know when you get a gut feeling and you just know. It ticked all my boxes!
It was open, spacious and light filled. the perfect first house for me!!

Its main features include:

3 Bedrooms
2 Bathrooms
Open plan living area
9 Foot ceilings
Attached garage with internal access
Alfresco area under main roof
Walk in Robe to master bedroom
Build in robes to minor bedrooms
Open and airy feel
Lots of Light


So what do you think? perfect first home or what..